The i2b2 Wizard contains sophisticated project and user management functions. Using the functions, you basically override the admin console, which can be accessed via http://localhost/admin on your i2b2 Hive. The i2b2 Wizard keeps track of your changes in the config directory and stores information locally. In other words, i2b2 Wizard does not read the contents of the database, e.g. to figure out if there are already existing projects.
Creating a new i2b2 project
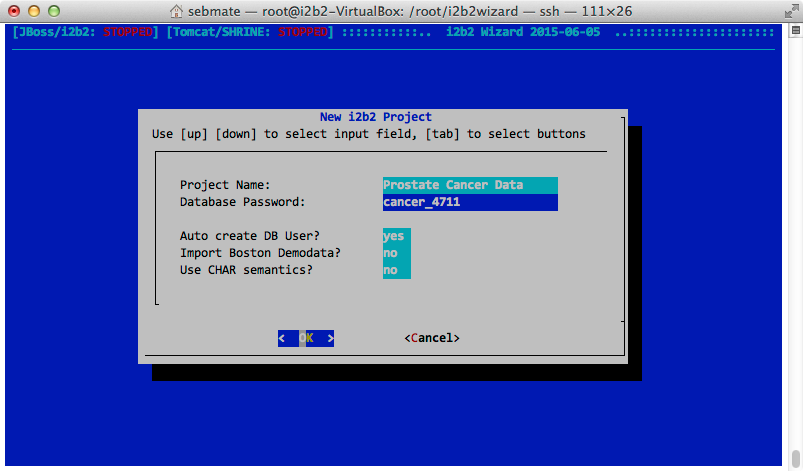
To create a new i2b2 project, choose "Projects & Users => Create i2b2 Project" from the main menu.
The dialog asks you for a project name and a database password. Do not use any special/foreign characters; also do not start your password with a number. Avoid spaces.
This will use the database settings and create a new database schema. The schema's name is composed by removing all spaces from the project name, switching all letters to upper case and adding the prefix "I2B2" (as set in "Project schema prefix" in "Configure default parameters"). In this case, this would result in I2B2PROSTATECANCERDATA.
Please note that i2b2 Wizard handles the creation of database schemas in a different manner: the tables for the different Web Services (ONT, WORK, CRC, IM) are all loaded into one schema.
Removing an i2b2 Project
To remove an i2b2 project, select "Projects & Users => Remove i2b2 Project" from the main menu. This removes the database schema and all assignments of i2b2 users to this project.
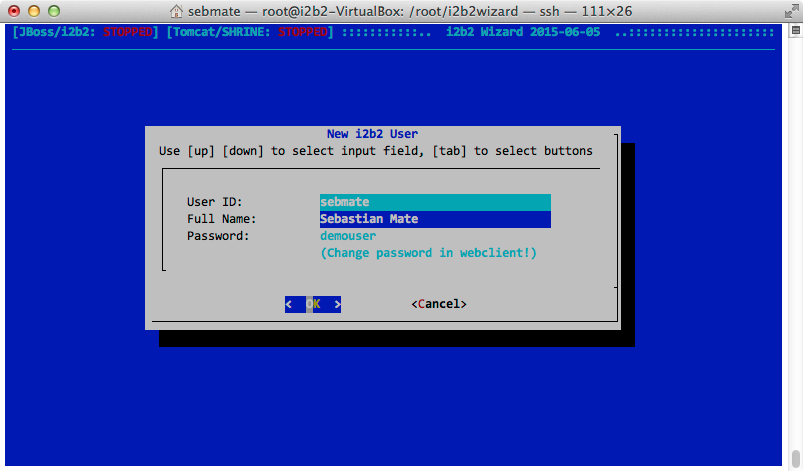
Creating an i2b2 user
To create a new i2b2 user, select "Projects & Users => Create i2b2 User" from the main menu. Please note that the default password is "demouser". The password can only be changed in the admin console, which can be accessed via http://localhost/admin on your i2b2 Hive.
Removing an i2b2 user
To remove an i2b2 user, select "Projects & Users => Remove i2b2 User" from the main menu. This removes all assignments of this to all projects as well.
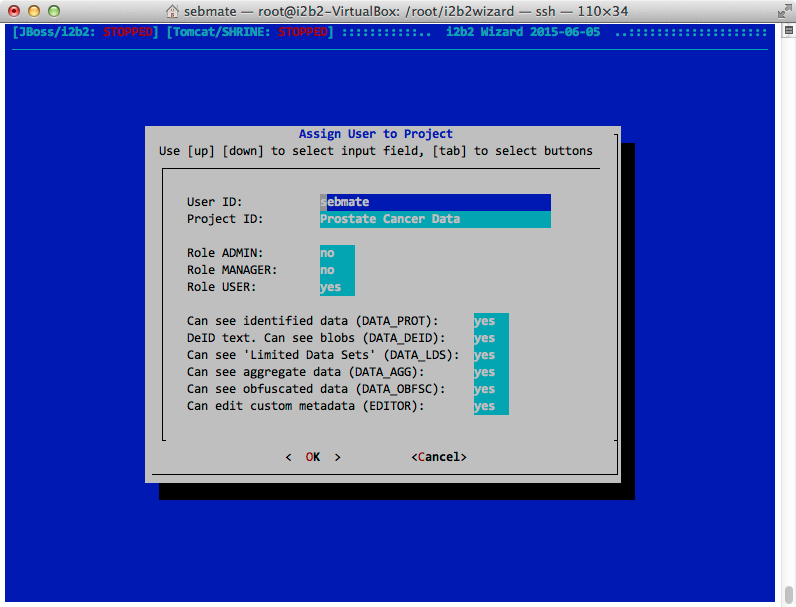
Assigning an user to a project
To assign an i2b2 user to a project, select either "Projects & Users => Assign User" from the main menu. For all the roles and permissions please refer to the official i2b2 documentation.


