Steps to Add a New Project
The following steps outline the process of adding a new project in the i2b2 Administration Module.
Assumption: The following steps assume you are already logged into the i2b2 Administration Module. If you do not know how to login please see the chapter titled i2b2 Administration Module Install.
1. In the Navigation panel, click on Manage Projects.
2. The Project Summary page will display on the right.

3. On the Project Summary page click on Add New Project.
4. The Project Data page will display.
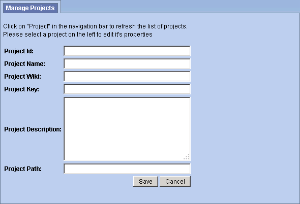
5. Enter the project information and click on Save to save the project.
6. The project will be added to the list of projects on the Project Summary page.
7. In the Navigation panel click on Manage Projects to refresh the hierarchical tree and display the new project.