Page History
...
Unzip
...
Unzip the ACT-Webclient folder into a local drive. The directory structure of the folder will look like this:

Step 3 : Update Configuration files
| Info Box | ||
|---|---|---|
| ||
It is a good idea to edit config files locally and then copy all files to the web server. |
To ensure that all the ACT i2b2 plugins work correctly, users must edit the ACT_config.php file according to their own environment. This file can be found right beneath act-webclient. Default config file looks like the following :
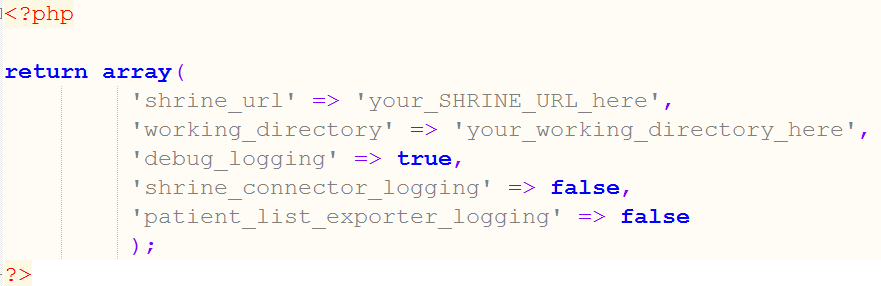
Details about shrine url and working directory can be found here : Support
Step 4 : Move web-client to thw web server
Once Step 1 through 3 are done, user must copy the edited ACT-webclient folder to their web server for deployment.
Step 5 : Validate ACT-webclient installation
After the ACT-webclient is successfully deployed to the web server, user can use validate their installation using a tool provided with the webclient. This too can be accessed at http(s)url to your webclient/ACT_requirements.php .