Page History
...
| Excerpt | ||||
|---|---|---|---|---|
A users' personal workspace, for storing favorite concepts and queries.
|
The main objectives of the 'Workplace' are:
- Save and organize user specific items.
- Share information with other project users.
- Project managers can view the workplace for individual team members.
...
The items stored in the 'Workplace
...
' panel can be used in many of the i2b2
...
panels and plug-ins, such as the 'Query Tool'.
7.1
...
Layout
...
 → Replace to an image including SHARE folder
of the 'Workplace' panel
| Anchor | ||||
|---|---|---|---|---|
|
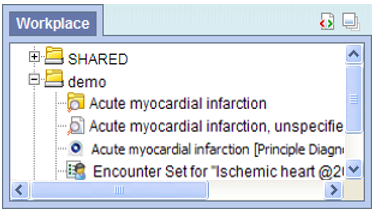
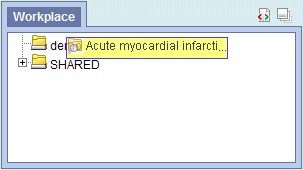
The 'Workplace'
...
panel is hierarchical display of items (concepts, queries) added by the user. There are three main branches or components of the tree that displays.
User Folder and SHARED Folder
...
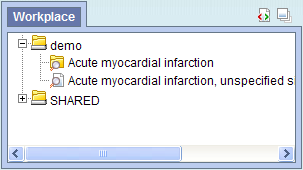
7.1.1 Containers
Containers are the highest level
...
folders (
...
![]() )
)
...
that are created automatically.
...
The User container is created with the user's name and
...
is used to store items added by the
...
user.
...
The SHARED
...
container is a place to share concepts and queries with other users.
...
Containers cannot be dragged into 'Query Tool' groups as query criteria.
7.1.2 Folders
A folder (
...
![]() ) contains other folders and / or items added by the user. It can be expanded and collapsed by clicking on the plus sign (
) contains other folders and / or items added by the user. It can be expanded and collapsed by clicking on the plus sign (
...
![]() ) or negative sign (
) or negative sign (
...
![]() ) next to it.
) next to it.
...
Items
...
7.1.3 Leaves (Items)
Leaves (items) are the lowest level of the hierarchy. They
...
cannot be expanded further. Some examples of items are listed below.
- Concepts (
...
-
 )
) - Group of concepts (ontology folder) (
...
-
 )
) - Modifiers (
...
-
 )
) - Group of modifiers (modifier folder) (
...
-
 )
) - Patient set (
...
-
 )
) - Encounter set (
...
- )
- Previous query (
 )
)
7.2
...
Adding a folder and items
7.2.1 Folders and Items Draggable to Workplace
Folders and Items can be dragged and dropped (copied) into the 'Workplace' panel from other panels in the i2b2 Web Client.
A Concept Folder( ![]() ) and all its concepts (children), a Modifier Folder (
) and all its concepts (children), a Modifier Folder ( ![]() ), a concept (
), a concept ( ![]() ), a modifier (
), a modifier ( ![]() ) can be dragged to the 'Workplace' from the 'Navigate/Find Terms' panel.
) can be dragged to the 'Workplace' from the 'Navigate/Find Terms' panel.
A Patient set ( ![]() ) , An Encounter set (
) , An Encounter set ( ![]() ) ,A previous query (
) ,A previous query ( ![]() ) can be added to the 'Workplace' by dragging from the 'Previous Queries' panel.
) can be added to the 'Workplace' by dragging from the 'Previous Queries' panel.
7.2.2 Adding a Folder
1. Using the right mouse button, click on your user folder in the 'Workplace'.
2. A pop-up menu will open.
...
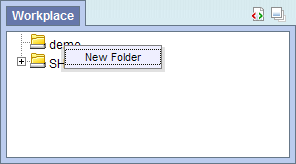
3. Select New Folder.
4. A new window will open.
...

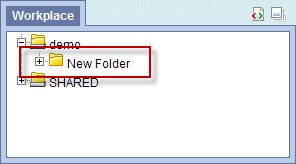
5. In the text box enter the name you want to be displayed.
6. Click on the OK button.
7. The new folder will appear in the 'Workplace
...
' panel.
...
7.2.3
...
Adding Items
Items Draggable to Workplace
Items can be dragged and dropped (copied) into the Workplace view from other views in the i2b2 Web Client.
- Folder
A folder ( ) and all its concepts (children) can be added to Workplace by dragging the folder name from one of the following views.
- Find Terms view
- Navigate Terms view
- Modifier Folder
A modifier folder ( ) and all its modifiers (children) can be added to Workplace by dragging the folder name from one of the following views.
- Find Terms view
- Navigate Terms view
- Concept
A concept ( ) can be added to Workplace by dragging the name of the concept from one of the following views.
- Find Terms view.
- Navigate Terms view
- Modifier
A modifier ( ) can be added to Workplace by dragging the name of the modifier from one of the following views.
- Find Terms view.
- Navigate Terms view
- Patient Set
A Patient set ( ) can be added to Workplace by dragging the name of the patient set from the following view.
- Previous Query view.
- Encounter Set
An Encounter set () can be added to Workplace by dragging the name of the encounter set from the following view.
- Previous Query view.
- Previous Query
A previous query ( ) can be added to Workplace by dragging the name of the previous query from the following view.
- Previous Query view.
Add Folders and Concept to Workplace View
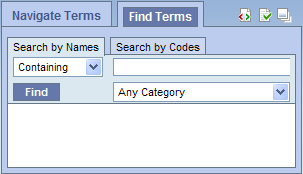
Find Terms View
The Find Terms view provides a way to search for a particular concept.

NOTE: For detailed information on how to search for terms, please see the i2b2 Find Terms help. |
Add Folder / Concept From Find Terms View
...
7.2.3.1 Adding Concept, Concept Folder, Modifier, and Modifier Folder
Adding from 'Find Terms' tab
1. In the Find Terms in 'Navigate/Find Terms' component, search for the item(s)
...
to add.
2. Highlight
...
the concept folder
...
(
...
![]() )
)
...
or other type (concept, modifier, modifier folder) of item by clicking on its name.
3. While holding the left mouse button down, drag the item over to
...
the 'Workplace' component.
4. Drop the item into either your workplace folder or the shared folder.
...

5. The item will now display in the 'Workplace
...
' panel with the same name.

Navigate Terms View
The Navigate Terms view contains a hierarchical display of all the concepts and modifiers that can be used to search the database.

NOTE: How the items are grouped and displayed is dependent on how the database is setup. |
Add Folder / Concept From Navigate Terms View
...

Adding from 'Navigate Terms' tab
1. In the 'Navigate/Find Terms > Navigate Terms' tab, expand the folder(s) that contains the concept or grouping of concepts you want to add.
...

- The item will now display in the Workplace view with the same name.

Add Modifier Folders and Modifiers to Workplace View
Find Terms View
The Find Terms view provides a way to search for a particular concept.
NOTE: For detailed information on how to search for terms and modifiers, please see the i2b2 Find Terms help. |
Add Modifier Folder / Modifiers From Find Terms View
- In the Find Terms view, search for the item(s) you want to add.
- Highlight the modifier folder () or modifier () by clicking on its name.
- While holding the left mouse button down, drag the item over to the Workplace view.
- Drop the item into either your workplace folder or the shared folder.

- The item will now display in the Workplace view with the same name.

Navigate Terms View
The Navigate Terms view contains a hierarchical display of all the concepts and modifiers that can be used to search the database.
NOTE:

NOTE: |
Add Modifier Folder / Modifier From Navigate Terms View
...
2. Highlight the folder( ![]() ) or other type (concept, modifier, modifier folder) of item by clicking on its name.
) or other type (concept, modifier, modifier folder) of item by clicking on its name.
...
3. While holding the left mouse button down, drag the item over to
...
the 'Workplace
...
'.
...
4. Drop the item into either your workplace folder or the shared folder.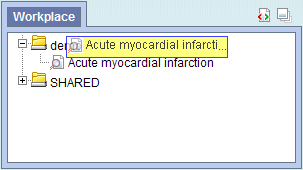
5. The item will now display in the 'Workplace
...
' panel with the same name.
...
7.2.3.2 Adding Previous Query, Patient Set, and Encounter Set
...
...
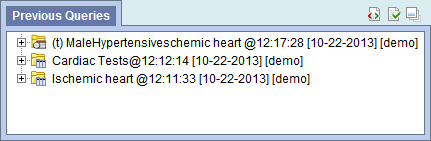
'Previous Queries' Panel
The
...
'Previous Queries' panel displays the queries that were run by the user. Each previous query contains a set of results; within these results are the result options that were selected when the query was originally run. The result options include Patient set, Encounter set, Number of patients as well as various other patient breakdowns
...
...
Adding Previous Query
...
from 'Previous Queries' Panel
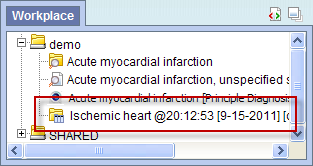
1. Highlight the previous query (
...
![]() ) by clicking on the name of the query.
) by clicking on the name of the query.
2. While holding the left mouse button down, drag the item to the 'Workplace
...
' panel.
3. Drop the previous query into either your workplace folder or the shared folder.

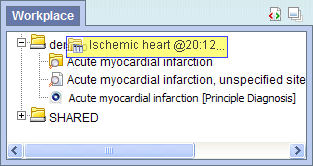
4. The previous query will now appear in the workplace with the same name.
...

...
Adding Patient Set
...
...
or Encounter Set from 'Previous Queries' Panel
1. Click on the plus sign (
...
![]() ) next to the name of the previous query that contains the patient set.
) next to the name of the previous query that contains the patient set.
...
2. Click on the plus sign (
...
![]() ) next to the results folder.
) next to the results folder.
...
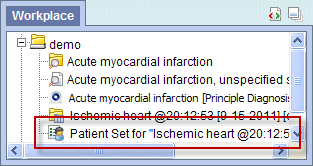
3. Highlight the Patient set
...
(
...
![]() ) or the Encounter set(
) or the Encounter set( ![]() ) by clicking on its name.
) by clicking on its name.
...
4. While holding the left mouse button down, drag the Patient Set
...
or the
...
Encounter set to the 'Workplace' panel.
...
5. Drop the patient or encounter set into either your workplace folder or the shared folder.

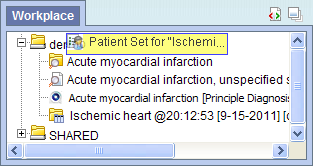
6. The patient set will now appear in the workplace.
...

Add Encounter Set From Previous Query View
- Click on the plus sign (
 ) next to the name of the previous query that contains the encounter set.
 - Click on the plus sign () next to the results folder.
- Highlight the Encounter set () by clicking on its name.
- While holding the left mouse button down, drag the Encounter Set to the Workplace view.
- Drop the encounter set into either your workplace folder or the shared folder.

- The encounter set will now appear in the workplace.

Navigation
7.3 Navigation
7.3.1 Folders
7.3.1.1 Expand / Collapse a Folder
Users can expand or collapse a folder by clicking on the plus sign (
...
![]() ) or negative sign (
) or negative sign (
...
![]() ) next to the folder icon.
) next to the folder icon.
...
Expand (Open) a Folder
1. Click on the plus sign (
...
![]() ) next to the folder in the 'Workplace
) next to the folder in the 'Workplace
...
' panel.
2. The folder will open and all the items in the folder will display.
Collapse (Close) a Folder
1. Click on the negative sign (
...
![]() ) next to the folder in the 'Workplace
) next to the folder in the 'Workplace
...
' panel.
2. The folder will close and all the items in the folder will display.
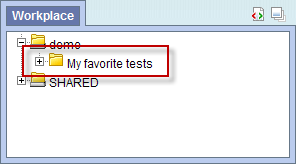
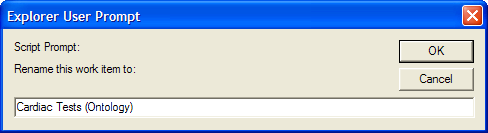
7.3.1.2 Rename a Folder
1. Users can easily rename an existing folder.
2. Using the right mouse button, click on the folder you want to rename.
3. A pop-up menu will open.


4. Select Rename from the list.
...


5. A new window will open.
...

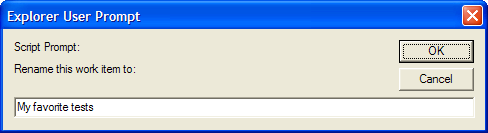
6. In the text box change the current name to the new name.
7. Click on the OK button.
8. The folder will appear in the 'Workplace
...
' panel with the new name.
...
...
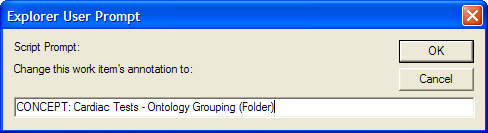
7.3.1.3 Annotate a Folder
Users can change the default annotation for any of their folders in the 'Workplace
...
' panel.
NOTE: |
1. Using the right mouse button, click on the folder you want to annotate.
2. A pop-up menu will open.
...
3. Select Annotate from the list.
...


4. A new window will open.

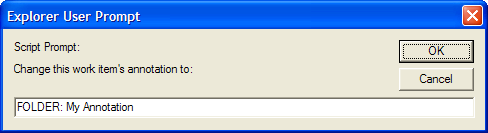
5. In the text box enter the text you want to appear when the tooltip is displayed.
6. Click on the OK button.
7. Using the mouse, hover over the folder you just annotated.
8. The text you entered will display as a tool tip.
...
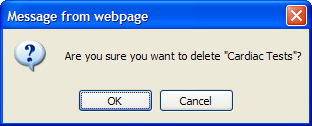
7.3.1.4 Delete a Folder
Users can remove a folder from the 'Workplace
...
' panel.
WARNING: |
1. Using the right mouse button, click on the folder you want to delete.
2. A pop-up menu will open.
3. Select Delete from the list.
...


4. A message box will open.

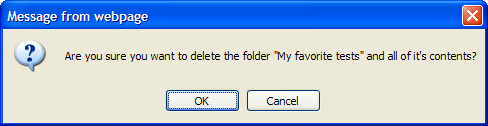
5. Click on the OK button.
6. The folder and all of its contents will no longer appear in the 'Workplace
...
' panel.
7.3.2 Items
7.3.2.1 Rename Items
1. Users can easily rename an item in the 'Workplace
...
' panel.
2. Using the right mouse button, click on the item you want to rename.
3. A pop-up menu will open.
...


4. Select Rename from the list.
...


5. A new window will open.

6. In the text box change the current name to the new name.
7. Click on the OK button.
8. The item will appear in the 'Workplace
...
' panel with the new name.
...
7.3.2.2 Annotate Items
Users can change the default annotation for any of the items in their Workplace folder.
NOTE: |
1. Using the right mouse button, click on the item you want to annotate.
2. A pop-up menu will open.
3. Select Annotate from the list.


4. A new window will open.

5. In the text box enter the text you want to appear when the tooltip is displayed.
6. Click on the OK button.
7. Using the mouse, hover over the item you just annotated.
8. The text you entered will display as a tool tip.
7.3.2.3 Delete Items
Users can remove items from the 'Workplace
...
' panel.
1. Using the right mouse button, click on the item you want to delete.
2. A pop-up menu will open.
...
...
3. Select Delete from the list.


4. A message box will open.

5. Click on the OK button.
6. The item will no longer appear in the 'Workplace
...
' panel.
7.4 Using Items in 'Workplace
...
This section describes how to use items in the Workplace view.
' Panel
7.4.1 Items Draggable from Workplace
Items can be dragged and dropped (copied) from the 'Workplace
...
' panel to other
...
panels in the i2b2 Web client.
Ontology Folder
...
(
...
- ) and all its concepts (children)
...
- Query Tool view; drop in the panel.
NOTE:
User folders
...
cannot be dragged from the 'Workplace
...
' panel.
- Modifier Folder
...
- (
...
- ) and all its modifiers (children)
-
...
- Query Tool view; drop in the panel.
- Concept
...
- (
...
- Query Tool view; drop in the panel.
- Modifier
A modifier () can be added to other views by dragging the name of the modifier from Workplace to one of the following views.
- Query Tool view; drop in the panel.
- Previous Query
A previous query () can be added to other views by dragging the previous query name from Workplace to one of the following views.
- Query Tool view; drop in the panel or Query Name.
- Patient Set
A specific set of patients can be added to other views by dragging the Patient set () from Workplaceto one of the following view.
- Query Tool view; drop in the panel.
- Encounter Set
A specific set of encounters (visit list) can be added to the other views by dragging the Encounter set () from Workplace to one of the following view.
- Query Tool view; drop in the panel.
Using Concepts and Folders
- )
- Modifier ( )
- Previous Query ( )
- Patient Set ( )
- Encounter Set ( )
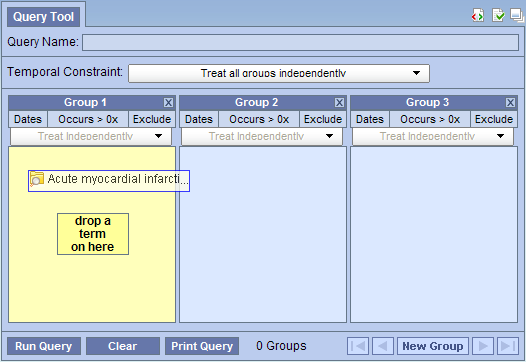
7.4.2 Using Folders, Concepts, Modifier Folders, Modifiers, Patient Set, and Encounter Set
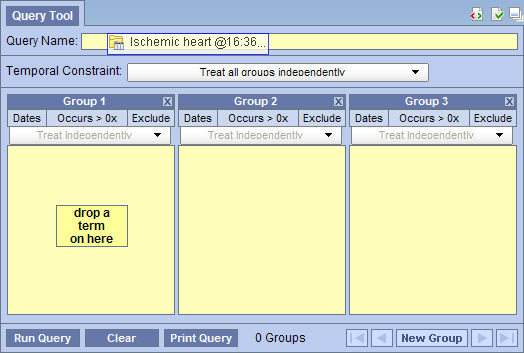
A folder or individual concept can be added to the
...
'Query Tool' Panel by simply dragging the item from 'Workplace
...
' panel and dropping it into one of the panels in the 'Query Tool
...
' panel.
...
...
Adding to 'Query Tool
...
' Panel
...

- The folder will now display in the panel for Group 1.

Add Concept to Query Tool View
- Highlight the concept () by clicking on the name of the folder.
- While holding the left mouse button down, drag the item over to the Query Tool view.
- Drop the item into the panel labeled Group 1.

- The concept will now display in the panel for Group 1.

Using Modifiers and Modifier Folders
A modifier folder or individual modifier can be added to the query tool view by simply dragging the item from the Workplace view and dropping it into one of the panel in the Query Tool view.
Add Modifier to Query Tool View
...
1. Highlight the folder (
...
![]() ), concept (
), concept ( ![]() ), modifier folder (
), modifier folder ( ![]() ), modifier (
), modifier ( ![]() ), patient set (
), patient set ( ![]() ), or encounter set (
), or encounter set ( ![]() ) by clicking on the name of the
) by clicking on the name of the
...
folder.
2. While holding the left mouse button down, drag the item over to the 'Query Tool
...
' panel.
3. Drop the item into the panel labeled Group 1.

...
4. The item will now display in the panel for Group 1.
...
...
7.4.3 Using Previous Query
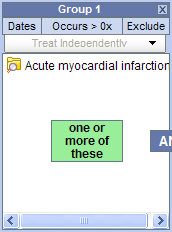
A previous query can be used to run a new query or as an item within a query (query-in-query). To add a previous query to the 'Query Tool
...
' panel simply drag the query name from the 'Workplace
...
' panel.
Within the 'Query Tool
...
' panel, the previous query can be added to one of the following two locations.
Query Name field | The items and constraints from the original query will be used to create a new query. This information can be edited to make a new query or can be used as is to run the query again. |
Panel (Group) | Used within a new query (query-in-query). The information associated with the previous query |
...
cannot be edited. Add additional search criteria (items) to be used in the new query. |
NOTE: |
...
' panel is the same for both standard i2b2 queries ( |
...
|
...
|
...
Adding Previous Query to Query Name in 'Query Tool' Panel (New Query)
1. Highlight the previous query (
...
![]() /
/
...
![]() ) by clicking on the name of the query.
) by clicking on the name of the query.
2. While holding the left mouse button down, drag the item to the 'Query Tool
...
' panel.
3. Drop the item into the Query Name field.

...
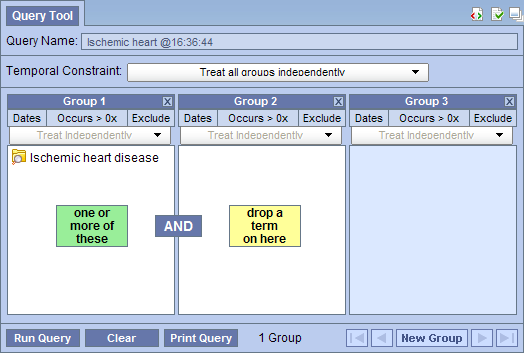
4. The item(s) associated with the previous query will display in the appropriate group(s), the name of the query will appear at Query Name, and any constraints that were defined when the original query was run will now default with the new query.
...
...
NOTE: |
...
Adding Previous Query to
...
Group in 'Query Tool' Panel (Query-in-Query)
1. Highlight the previous query (
...
![]() /
/
...
![]() ) by clicking on the name of the query.
) by clicking on the name of the query.
2. While holding the left mouse button down, drag the item to the 'Query Tool
...
' panel.
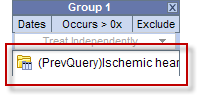
3. Drop the item into the panel labeled Group 1.


4. The previous query will now display in the panel for Group 1.

Using Patient Set
A Patient set can be used as an item within a query. To add a patient set to the Query Tool view simply drag the name of the patient set from the Workplace view.
Add Patient Set From Workplace View
- In the Workplace view, expand the folder(s) that contains the list of patients you want to add.
- Highlight the Patient set () by clicking on its name.
- While holding the left mouse button down, drag the item over to the Query Tool view
- Drop the item into the panel labeled Group 1.

- The item will now display in the panel for Group 1.

Using Encounter Set
An Encounter set can be used as an item within a query. To add an encounter set to the Query Tool view simply drag the name of the encounter set from the Workplace view.
Add Encounter Set From Workplace View
- In the Workplace view, expand the folder(s) that contains the list of patients you want to add.
- Highlight the Encounter set () by clicking on its name.
- While holding the left mouse button down, drag the item over to the Query Tool view
- Drop the item into the panel labeled Group 1.

- The item will now display in the panel for Group 1.

7.1 Workplace Operations
a. Open/Close Folders
b. Drop in items
(Queries, Patients, Patient Sets, Terms)
c. Renaming items
7.1. Personal Folder
7.2 SHARED Folder