Page History
| Table of Contents |
|---|
i2b2 User Registration Guide
A guide on how to do the following:
enable/disable user self-registration in i2b2 webclient
self-register new user
assign project and roles to new user (for administrator only)
Whenever a new user is added (registered) into the system, no project is assigned to the user. Therefore, the new user cannot sign into the i2b2 application immediately after self registering. The administrator has to do the following first before the new user can sign in:
add the new user to a project
add the project roles to the new user
Enabling or Disabling User Self-Registration
The i2b2 webclient has two ways to self-register, local self-registration and federated self-registration.
Enabling Local User Self-Registration
Modify the file config.php that is located in the directory /var/www/html/webclient/registration/user to enable user self-registration. Set the value of the PHP attribute config_pm_uri to ***'http://127.0.0.1:9090/i2b2/services/PMService/getServices'***.
Replace 127.0.0.1:9090 with the address of your PM cell if it is not on the same machine as the webserver!
For an example:
...
_
...
Modify the file i2b2_config_data.json that js that is located in the directory /var/www/html/webclient/ to enable option for user self-registration. Set the value of the attribute showRegistration to true and set the value of the attribute registrationMethod empty. Again, replace More detailed instructions are here.
| Info |
|---|
User registration requires the webserver and Wildfly to be running on the same server, so make sure that urlCellPM is 127.0.0.1:9090 |
...
! (Your port could be different.) |
For an example:
{
"domain": "i2b2demo",
"name": "HarvardDemoi2b2_local",
"allowAnalysis": true,
"urlCellPM": "http:\/\/127.0.0.1:9090\/i2b2\/services\/PMService\/",
"registrationMethod": "local",
"loginType": "local",
"showRegistration": true,
"debug": true
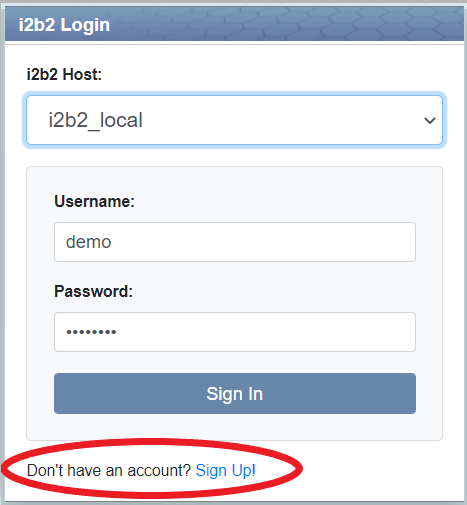
}Refresh the webpage and you should see the option to register user (circled in red):

Enabling Federation User Self-Registration
Modify the file i2b2_config_data.json located js located in the directory /var/www/html/webclient/. Set the value of the attribute showRegistration to true and set the value of the attribute registrationMethod to saml.(Here
| Info |
|---|
urlCellPM must be 127.0.0.1 |
...
because the AJP proxy for the PM cell will always run on the same |
...
server as the client. |
...
Here, no port is specified because we want the client to talk to the AJP proxy. |
For an example:
{
"domain": "i2b2demo",
"name": "HarvardDemoi2b2_saml",
"allowAnalysis": true,
"urlCellPM": "http:\/\/127.0.0.1:9090\/i2b2\/services\/PMService\/",
"registrationMethod": "saml",
"loginType": "federated",
"showRegistration": true,
"debug": true
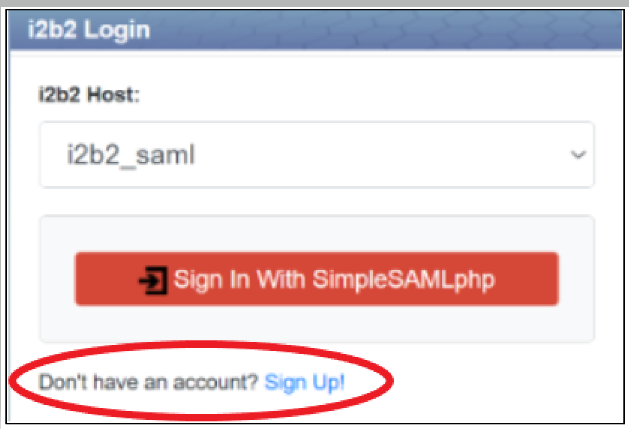
}Refresh the webpage and you should see the option to register user (circled in red):

Disabling User Self-Registration
To disable user self-registration for either local registration or federation registration, set the value of the attribute showRegistration to false in the file file i2b2_config_data.json located js located in the directory /var/www/html/webclient/.
Self-Registering New User
Local Self-Registering New User
Click on the "Sign Up!" link on the bottom of the i2b2 Login dialog. A "Sign Up" modal will pop up containing a form for self-registering. Fill out the user information on the left of the form. Carefully read the terms-and-conditions, click on the checkbox "I accept the Terms & Conditions", and click on the button "Sign Up" to register on the right side of the form.
...
Once registered, the sign-up modal will disappeared and a confirmation alert will pop up at the main (login) page:

Federation Self-Registering New User
Click on the "Sign Up!" link on the bottom of the i2b2 Login dialog. A "Sign Up" modal will pop up containing a button to redirect you to your Identity Provider (IdP) for logging in:
...
Note that the new user cannot sign in immediately after self-registering. An administrator has to add the new user to a project and add the project roles to the new user. Below is the error shown if the new user attempts to log in immediately after registering:

Changing the Terms and Conditions
The content of the "Terms & Conditions" box in the registration tool can be changed by modifying the file /var/www/html/webclient/i2b2-js/i2b2_ui_config.js
Modify the termsCondition parameter of the JSON object i2b2.UI.cfg .
| Code Block | ||
|---|---|---|
| ||
i2b2.UI = {};
/* Start Configuration. Note: be careful to keep trailing commas after each parameter */
i2b2.UI.cfg = {
    ...
    termsCondition: "Terms & Conditions\n\nDo not talk about i2b2. It is a secret."
    ...
}; |
Adding New User to a Project
In the admin tool, you will see the new self-registered user. Follow the admin tool instructions to add that user to a project.
(The author's original version of this document is at: https://github.com/kvb2univpitt/i2b2-saml-demo/tree/main/doc/user_registration)