Page History
| Section | ||||||||||||||||||||||||||||
|---|---|---|---|---|---|---|---|---|---|---|---|---|---|---|---|---|---|---|---|---|---|---|---|---|---|---|---|---|
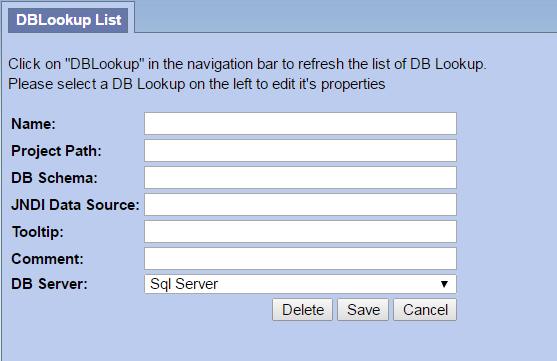
Update Database Lookup tablesThe DB_LOOKUP tables all the cells to find the right database schema for a particular project. As of i2b2 release 1.7.07 the DB_LOOKUP tables can be added, edited and removed from within the i2b2 Admin Module. The following steps will walk you through adding a new CRC_DB_LOOKUP and ONT_DB_LOOKUP for your OMOP database schema and OMOP project. CRC_DB_LOOKUP1. Log into your i2b2 Admin Module 2. In the PM Navigation tree on the left, expand Manage Cells to display a list of your i2b2 cells currently configured. 3. Expand the entry for your Data Repository and you will see an item listed called DB-Lookup. 4. Select DB-Lookup in the Navigation panel to display the DB-Lookup List page. 5. On the right side of the page, click on Add New DB-Lookup. 6. The DB-Lookup enter / edit page will display.
7. Add the following information:
8. Click on Save to file the changes to the CRC_DB_LOOKUP table. ONT_DB_LOOKUPThe steps to update the ONT_DB_LOOKUP table are, for the most part the same as the CRC_DB_LOOKUP table. The only notable exceptions are: (1) Expand the Ontology Cell instead of the Data Repository Cell (2) The Project Path does not contain a leading forward slash
|