Page History
...
- If you are using a prebuilt WAR file: Copy the .war file into a wildfly 14 or 16 instance in the /opt/wildfly-VERSION-Final/standalone/deployments/ folder
- If you are creating a new WAR file : 1) Run in the edu.harvard.i2b2.server-common folder
2) ant clean dist war
3) Copy the i2b2.war from the dist folder to /opt/wildfly-VERSION-Final/standalone/deployments/ folder. - Run the data build for all the cell (PM, HIVE, ONT and CRC) . In the Hive there is a new table called HIVE_CELL_PARAM which contains all the previous XML and properties file.
- Modify the *-ds.xml in the deployment folder to point to the database
Example:
If you wanted to create a root level folder in your ontology called "PHI Demonstration" and only wanted users with the DATA_PROT role to be able to see it, you would make the following changes to your TABLE_ACCESS table:
...
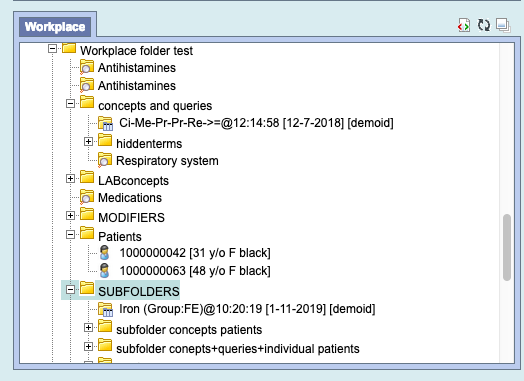
New Feature: Workplace Folder drag and drop
Now you can drag a workplace folder to the query tool, the folder can contain sub folders. All the concepts, previous queries, and individual patients will be displayed in the panel.
Below is the workplace with combination of available items
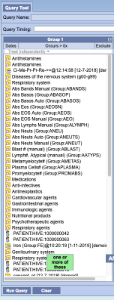
After the drag and drop to the query panel the list of all the items are displayed
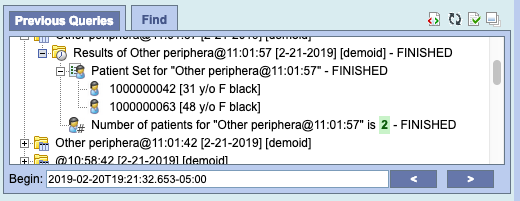
New Feature: Individual Patient drag and drop from Previous Query Panel
Once a patient set is created, that patient can be dragged and dropped to the Query Tool Panel
Below is a patient set with 2 patients
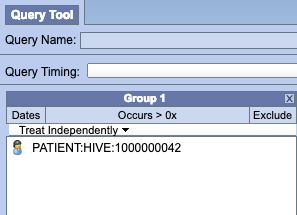
After drag and drop of the individual patient to the query tool panel
New Feature: Previous Queries Upgrade in Web Client
The Previous Queries panel in the web client has been upgraded to accommodate three new options.
...
New Feature: Support for WildFly 14
The i2b2 software now officially supports WildFly 14. The primary advantages are the faster install/upgrade of i2b2 as a pre-packaged collection (WAR) and managed data source connections/pooling.
New Feature: Inter-CELL SSL Setup
Create server and client certificates (Wildfly 10 & 14)
The keytool utility stores the keys and certificates in a file termed as keystore, a repository of certificates used for identifying a client or a server. Typically, a keystore contains one client or one server's identity, which are protected by using a password.
Create a Self Signed Certificate
You can create a certificate for your server using the following command:
...
1
...
$ keytool -genkey -keyalg RSA -keystore server.keystore -storepass secret -keypass secret -validity 365 -dname "cn=Partners Healtbcare,o=Partners,c=US"
Now let's copy this keystore into the configuration folder of the application server:
...
1
...
$ cp server.keystore $JBOSS_HOME/standalone/configuration
Now export the server certificate in a file called server.crt:
1
...
$ keytool -exportcert -keystore server.keystore -storepass secret -keypass secret -file server.crt
Certificate stored in file <server.crt>
Now import the cert into the CA for the Java JRE:
...
1
$ keytool -import -alias i2b2server -keystore /usr/java/latest/jre/lib/security/cacerts -file server.crt
The password might be changeit
In /opt/{wildfly} in bin run add-user.sh to create user and select (a) management user
Wildfly 10 Setup
In Wildfly 10 run jboss-cli.sh
Connect to the server
1 | connect |
Start by creating a Security Realm which will contain the keystore and trustore references
...
1
...
/core-service=management/security-realm=SSLRealm:add
Next, for one-way SSL, set the path to the keystore, along with the keystore path and password:
...
1
...
/core-service=management/security-realm=SSLRealm/server-identity=ssl:adJavathe2d(keystore-path="server.keystore", keystore-relative-to="jboss.server.config.dir", keystore-password="secret")
Finally, set the value of Undertow's https listener to your Security Realm:
...
1
...
/subsystem=undertow/server=default-server/https-listener=default-https:write-attribute(name=security-realm,value=SSLRealm)
If the above fails edit the standalone.xml and add right after http-listener
<https-listener name="default-https" security-realm="SSLRealm" socket-binding="https"/>
Wildfly 14 Setup
In Wildfly 14 run jboss.cli.sh
Connect to the server
...
1
...
connect
Finally, set the value of Undertow's https listener to your Security Realm:
...
1
...
/subsystem=undertow/server=default-server/https-listener=https:write-attribute(name=security-realm,value=ApplicationRealm)
Both Wildfly 10 and 14
Add the following to the axis2.xml file right after the <transportReceiver name="http"
<transportReceiver name="https"
class="org.apache.axis2.transport.http.AxisServletListener"/>
Change the crc.properties, ontology.properties and workplace.properties files to point to the https://localhost:8443
Database Changes
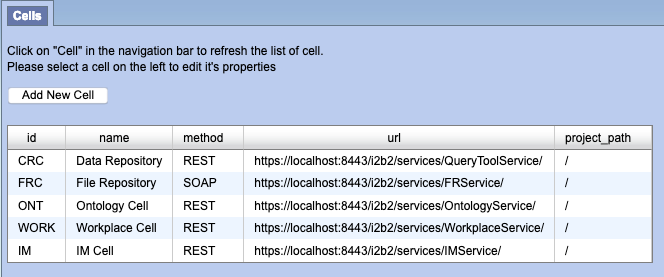
Change all the pm_cell_data within the PM Database to https://localhost:8443

After all the cells have been updated it should look like below.
Webclient Changes
Webclient, if using self-signed cert add the following to the index.php
curl_setopt($proxyRequest, CURLOPT_SSL_VERIFYHOST, 0);
curl_setopt($proxyRequest, CURLOPT_SSL_VERIFYPEER, 0);
Also into the index.php add the new url to the whitelist such as:
$WHITELIST = array(
"http" . (($_SERVER['SERVER_PORT'] == '443') ? 's' : '' ) . "://" . $_SERVER['HTTP_HOST'],
);
Updated: i2b2 License
...
New Feature: More authentication protocol support (okta, NTLM v2)
- Support for NTLM2 is supported. Instead of using authentication_method - NTML use NTML2
- Support for OKTA
New Feature: RedCap
1) Set Project Params (PM_PROJECT_PARAM)
| Name | Value | Description |
|---|---|---|
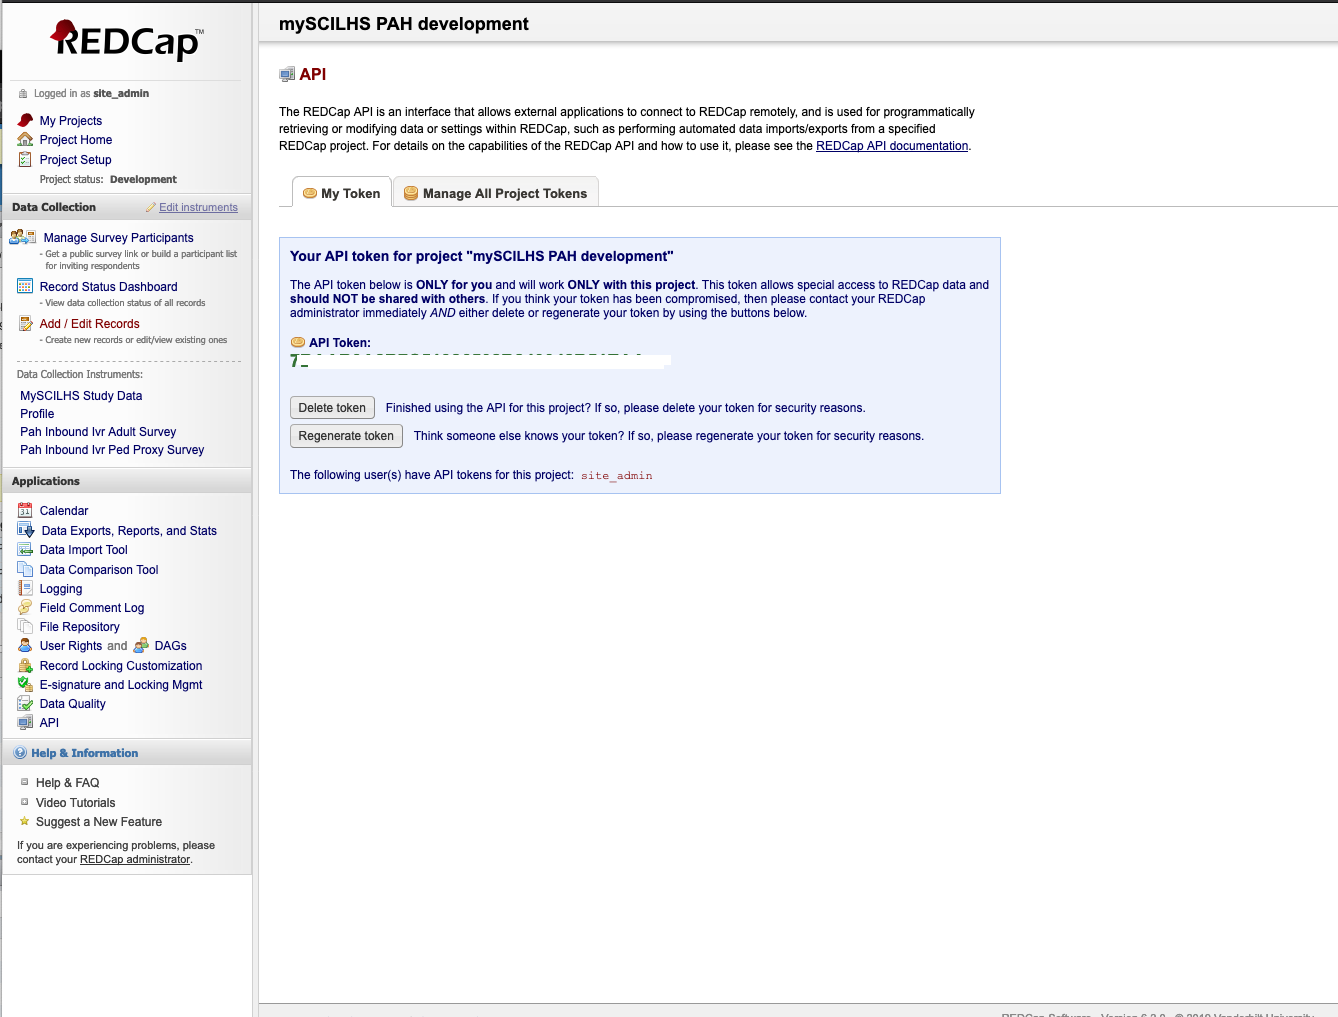
| REDCP_TOKEN | (7B42348B7C51123432048B51EAA) | Required: Get the API Key from Redcap. Logon to Redcap on the right side under applications click API. Than select Generate token, and use this token for the value for the key. |
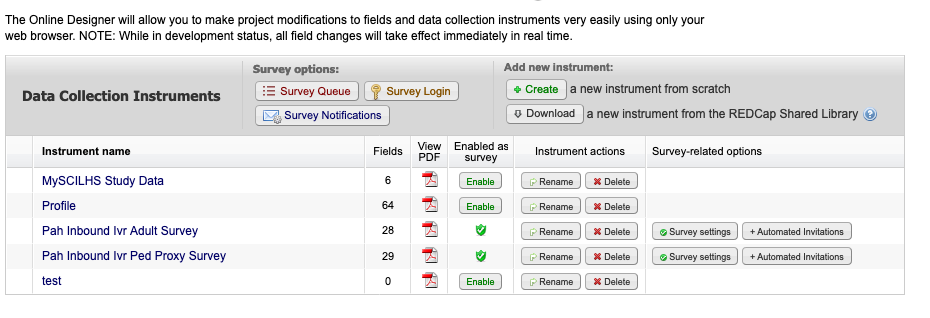
| REDCAP_SURVEY_FORM | (profile) | Required: This is the name of the Data Collection Instruments to associate this project with, in this example it is set to the 'Profile'
|
| REDCAP_ONTOLOGY_REFRESH | Y | Optional, Defaults to Y N - Do Not regenerate the metadata ontology. NOTE: When first setting up the i2b2/redcap this needs to be set to Y at least one or the ontology will not be created. |
| REDCAP_ROOT_ONTOLOGY | \REDCAP\ | Optional, Defaults to \REDCAP\ |
| REDCAP_ONTOLOGY_FORMAT | tree | Optional, Defaults to tree tree - All enumerated values, Yes/No will be children on the ontology The only exception is items with checkbox, which will always be a popup |
| RECAP_PROTECTED_ROLE | DATA_PROT | Optional, Defaults to DATA_PROT If this redcap form has the identified value set to true, than this ontology will be protected and only users with the following i2b2 access role will be able to access it. |
2) On the redcap side, set the Data Entry Trigger, it is under Project Setup → in Enable optional modules and customizations, select Additional customizations → Data Entry Trigger, and enter:
http://{i2b2 url}/i2b2/services/QueryToolService/redcapPush
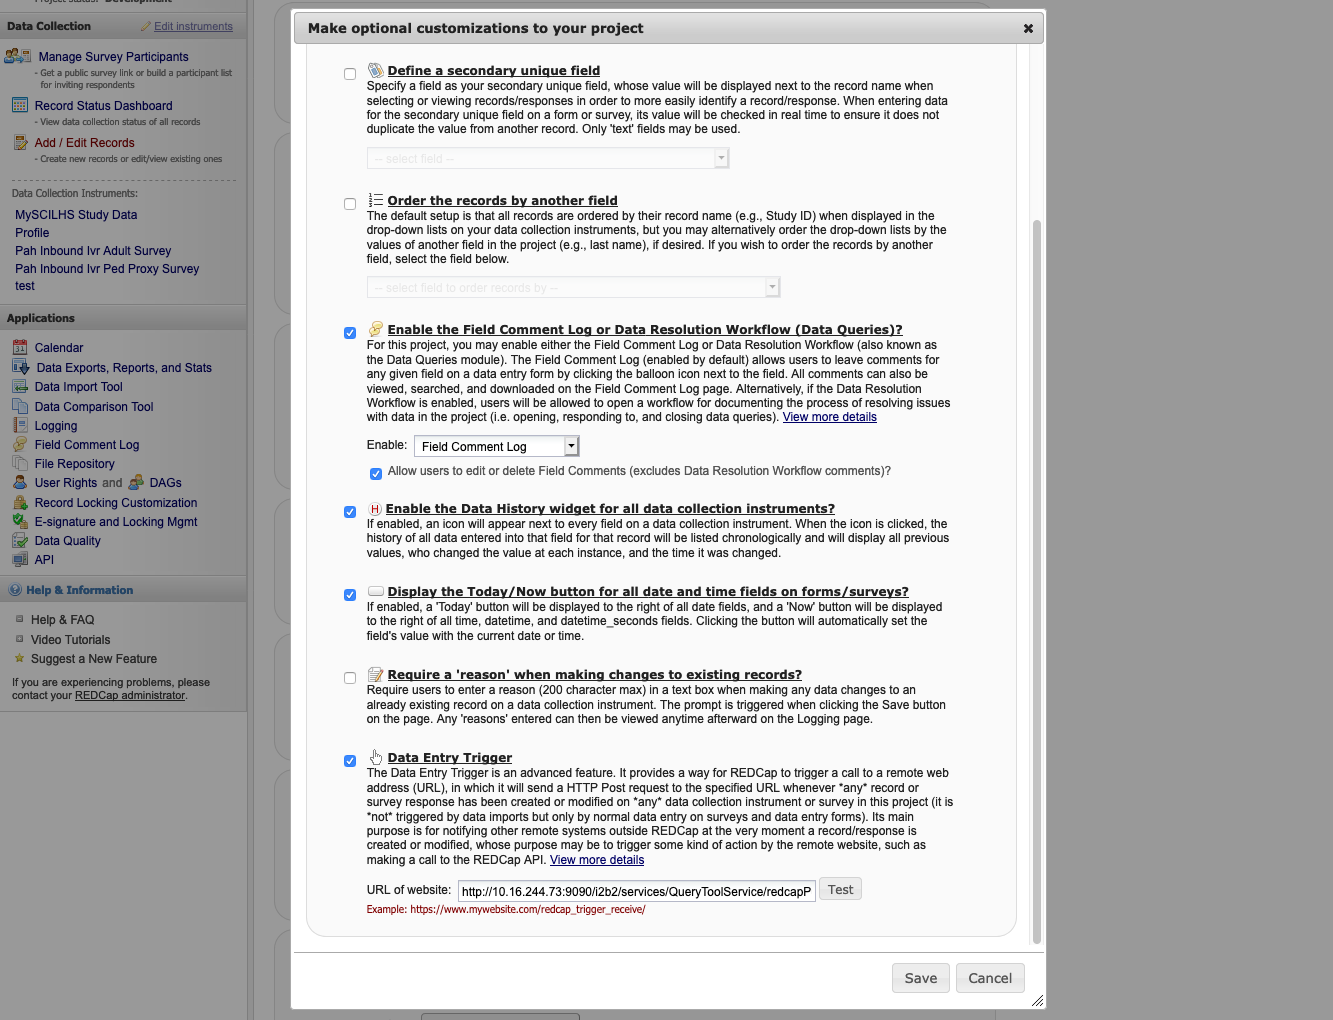
Click Test to verify connection
3) Submit a form and check to see if the ontology was created.
New Feature: Enhanced Find Terms
Find terms gives a sense of the hierarchy, and terms that are children of other search results are not returned.

New Feature: Improved Maximized Left Pane
In maximized mode, the left pane now makes all tabs accessible.

New Feature: Totalnum scripts
In the Release_1-7/NewInstall/Metadata/ run the ant script
ant -f data_build.xml create_metadata_tables_release_1-7 - This will create the stored procedures
- POSTGRESQL : ant -f data_build.xml db_metadata_run_total_count_postgresql
- ORACLE : ant -f data_build.xml db_metadata_run_total_count_oracle
- SQL SERVER : ant -f data_build.xml db_metadata_run_total_count_sqlserver
New Feature: ACT Ontology
- In the Release_1-7/NewInstall/Metadata/db.properties file change the db.project from demo to act.
- Than run the ant script against create_metadata_tables_release_1-7 and db_metadata_load_data