Page History
THIS FEATURE WILL BE AVAILABLE MARCH 2023
Design
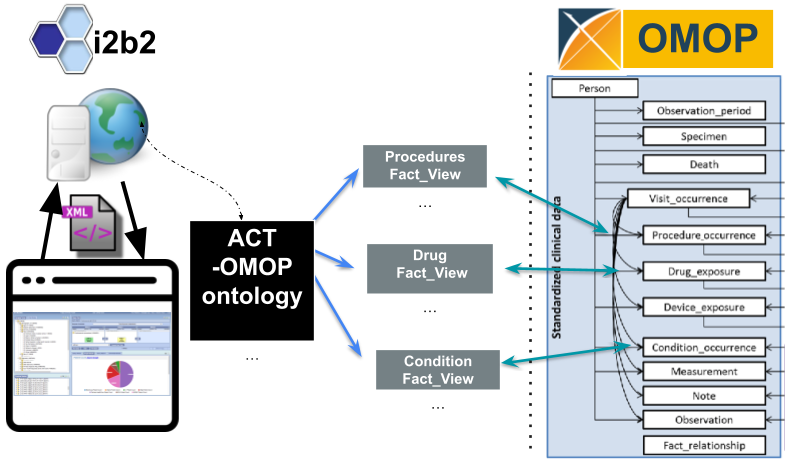
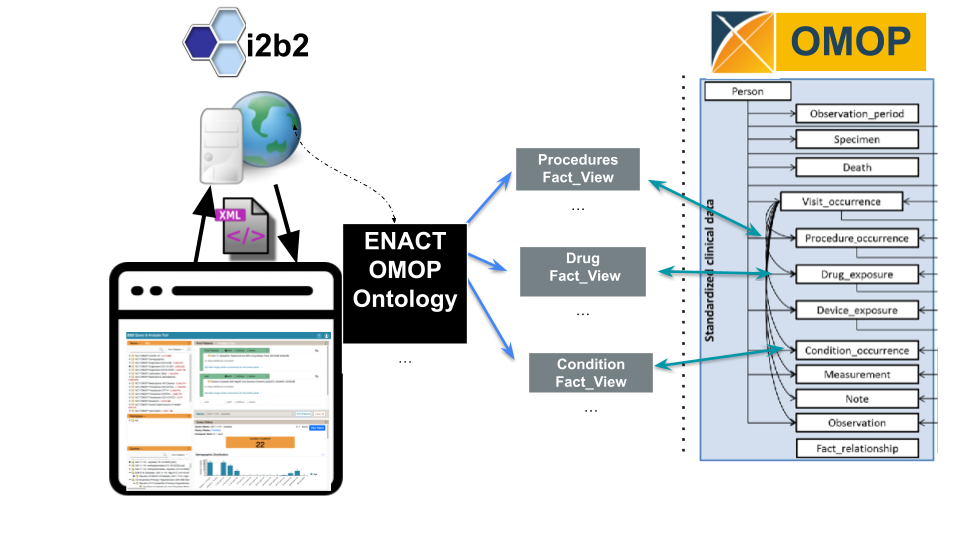
Utilizing i2b2's reusable application programming interface (API)
, the OMOP data model is now supported. The
ENACT-OMOP ontology queries OMOP table views that correspond to the OMOP table structure.
The i2b2 query tool tables and ENACT-OMOP ontology are installed in a he OMOP data and the i2b2 application layer are loaded. With the ontology, it becomes possible to query OMOP tables using the i2b2 interface.
Steps to build ACT-OMOP Ontology
The design document can be found here.
Step 1: Acquire downloads
First, download the necessary components onto a computer that can connect to your target database and from which you can run SQL queries.
- Download i2b2.
- Download and extract the newinstall newi nstall zip package from "Download Binary Distribution" in the top section of https://www.i2b2.org/software
- Determine if you need to install any additional required packages, such as Java JDK or Ant: Chapter 2. Requirements
- If running less than i2b2 1.8, separately download the latest data package from GitHub https://github.com/i2b2/i2b2-data to get the ACT-OMOP ontologies.
- OMOP 5.4 DDL SQL Scripts: https://github.com/OHDSI/CommonDataModel/tree/main/inst/ddl/5.4
- Either clone the repository or download the ETL scripts for your database platform.
Step 2:
CreateInstall i2b2, with ACT-OMOP core tables
(OMOP,
i2b2views, and
ACT-OMOP specific):OMOP:ontologies.
- OMOP: If you will be creating a new OMOP database for this installation, then:
- Run the OMOP 5.4 DDL SQL Scripts you downloaded in the last step, using a SQL client.
- It is recommended to run the DDL, indices, and primary key scripts, but NOT the constraints scripts. This can cause problems during ETL.
- Run the OMOP 5.4 DDL SQL Scripts you downloaded in the last step, using a SQL client.
- This step can be skipped if you already have OMOP on your target database.
- i2b2: You will be installing i2b2 as explained in the installation guide. Follow the chapters in the installation guide, but see the notes in the next bullet on Chapter 3.
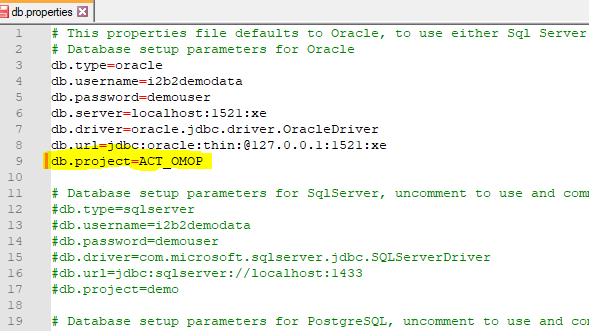
- Chapter 3. Data Installation requires special handling. All the steps in the installation guide should be followed except for the following changes in the CRC and Metadata sections::
- You need to select the act-omop project for Metadata and CRC. Specifically, in 3.4.2 Set Database Properties (CRC) and 3.7.2 Set Database Properties (Metadata), edit the CRC db properties file
- to set db.project parameter to act-omop.
 In
In 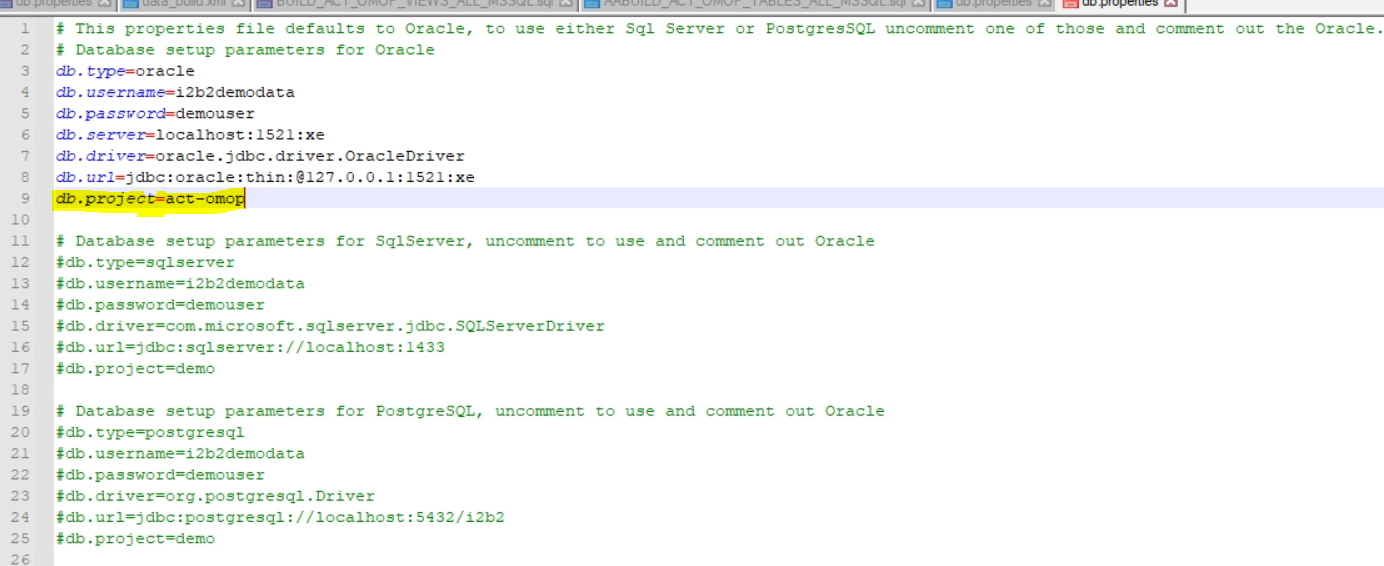
- Instead of CRC install step 3.4.
Step 3: ACT-OMOP v4 ontology data load and Views creation process
- 4, drop the patient_dimension and visit_dimension tables from the database. For convenient reference, the correct steps 3.4.3-3.4.5 are summarized here:
ant -f data_build.xml create_crcdata_tables_release_<version no>
FROM THE DATABASE: DROP PATIENT_DIMENSION; DROP VISIT_DIMENSION;
ant -f data_build.xml create_procedures_release_<version no>
ant -f data_build.xml db_demodata_load_data
The final ant script will create act-omop Views, which point to the OMOP tables, and loads the concept_dimension table with act-omop concepts data. The first two steps create the standard CRC tables and procedures. In 3.7.4, only load the regular data, not the identified data. Run the ant
- 4, drop the patient_dimension and visit_dimension tables from the database. For convenient reference, the correct steps 3.4.3-3.4.5 are summarized here:
command:
ant -f data_build.xml db_metadata_load_
data
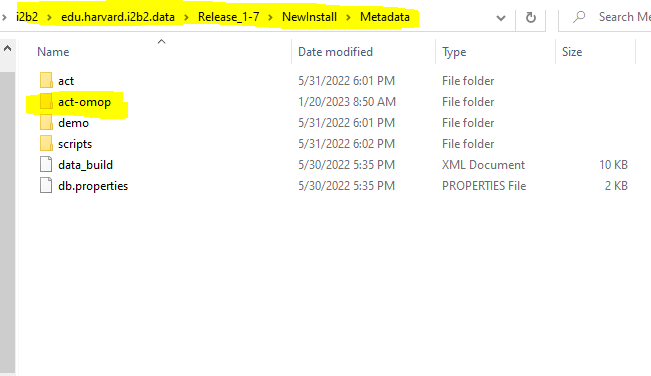
- This will execute the SQL scripts from the edu.harvard.i2b2.data\Release_
- <version no>\NewInstall\Metadata\act
- -omop\scripts\<db type> folder
- and:
- and:
- Creates ACT-OMOP v4.1 Ontology metadata tables with indexes.
- Loads the
- act-omop metadata
- Make sure i2b2 is configured for multiple fact tables by changing the appropriate entry in the database.
| Info |
|---|
Be sure to drop/rename PATIENT_DIMENSION and VISIT_DIMENSION tables before you run the db_demodata_load_data ant target. |
| Info |
|---|
The Lab metadata tables should have data in the C_METADATAXML column in order for the lab values to be queriable from UI If the C_METADATAXML is missing from the source ontology Lab metadata file, you can load the values from the standard i2b2-ACT Lab metadata table. |
Step 4: Build ACT-OMOP CONCEPT DIMENSION
Perform step 3.4.5. This must be done after the metadata are loaded. From the edu.harvard.i2b2.data\Release_1-7\NewInstall\CRC folder, run the ant command: ant -f data_build.xml db_demodata_load_data
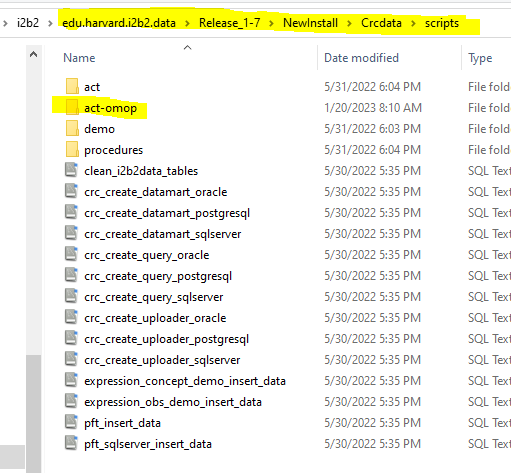
This will execute the create_omop_act_concept_dimension SQL script from the edu.harvard.i2b2.data\Release_1-7\NewInstall\Crcdata\scripts\act-omop\<db type> folder and loads A concept dimension table
Step 5: Create Project
Finally| Info |
|---|
The CPT4 ontology table is not included with i2b2 due to AMA restrictions on redistribution of CPT code information. Contact the ACT team to get a copy if your institution is an AMA member. |
Step 3: Advanced Users - Create Project
If an OMOP project will coexist with an i2b2 project, set up an i2b2 OMOP project pointing to the i2b2-OMOP database that you just configured.
6.6.0. [DRAFT] Guide to creating a new project with the admin tool.
Verify the Ontology is displayed and queriable from the webclient
| Info |
|---|
The concept_Dimension is populated from metadata tables. Verify create_omop_act_concept_dimension.sql to ensure it has complete metadata tables information before running the script Example: the ACT/OMOPVital_Signs information should be in the script to load the ACT/OMOPVital_Signs concept data |
Notes
Both the ACT-OMOP Ontology tables, views and data is available under edu.harvard.i2b2.data\Release_1-7<version no>\NewInstall\Metadata\act-omop folder.
The scripts are in this folder:
These are the ACT-OMOP ontology tables.
ACT_ICD10CM_DX_ |
V41_OMOP ACT_ICD10PCS_PX_ |
V41_OMOP ACT_ICD9CM_DX_ |
V41_OMOP ACT_ICD9CM_PX_ |
V41_OMOP ACT_ |
HCPCS_PX_ |
V41_OMOP ACT_MED_ALPHA_ |
V41_OMOP ACT_MED_VA_ |
V41_OMOP ACT_ |
LOINC_ |
LAB_ |
PROV_V41_OMOP ACT_LOINC_LAB_ |
V41_ |
OMOP ACT_SDOH_ |
V41_OMOP ACT_VITAL_SIGNS_ |
V41_OMOP |
ACT_VISIT_DETAILS_ |
V41_OMOP ACT_COVID_ |
V41_OMOP ACT_DEM_ |
V41_OMOP ACT_ICD10_ICD9_DX_ |
V41_OMOP ACT_RESEARCH_V41_OMOP ACT_VAX_V41_OMOP ACT_ZIPCODE_V41_OMOP |
These are the ACT-OMOP views:
EMPTY_VIEW; * this is actually an empty table CONDITION_VIEW; |
DRUG_VIEW; |
MEASUREMENT_VIEW; |
OBSERVATION_VIEW; PROCEDURE_VIEW; COVID_LAB_VIEW; |
PATIENT_ |
DIMENSION; |
VISIT_DIMENSION; |
DEVICE_ |
VIEW; |
CONDITION_NS_VIEW; DRUG_NS_VIEW; MEASUREMENT_NS_VIEW; OBSERVATION_NS_VIEW; PROCEDURE_NS_VIEW; DEVICE_NS_VIEW; VISIT_NS_VIEW; |
- ETL OMOP data
- This is a site-specific process, but OHDSI's WhiteRabbit tool can help: https://github.com/OHDSI/WhiteRabbit