Page History
...
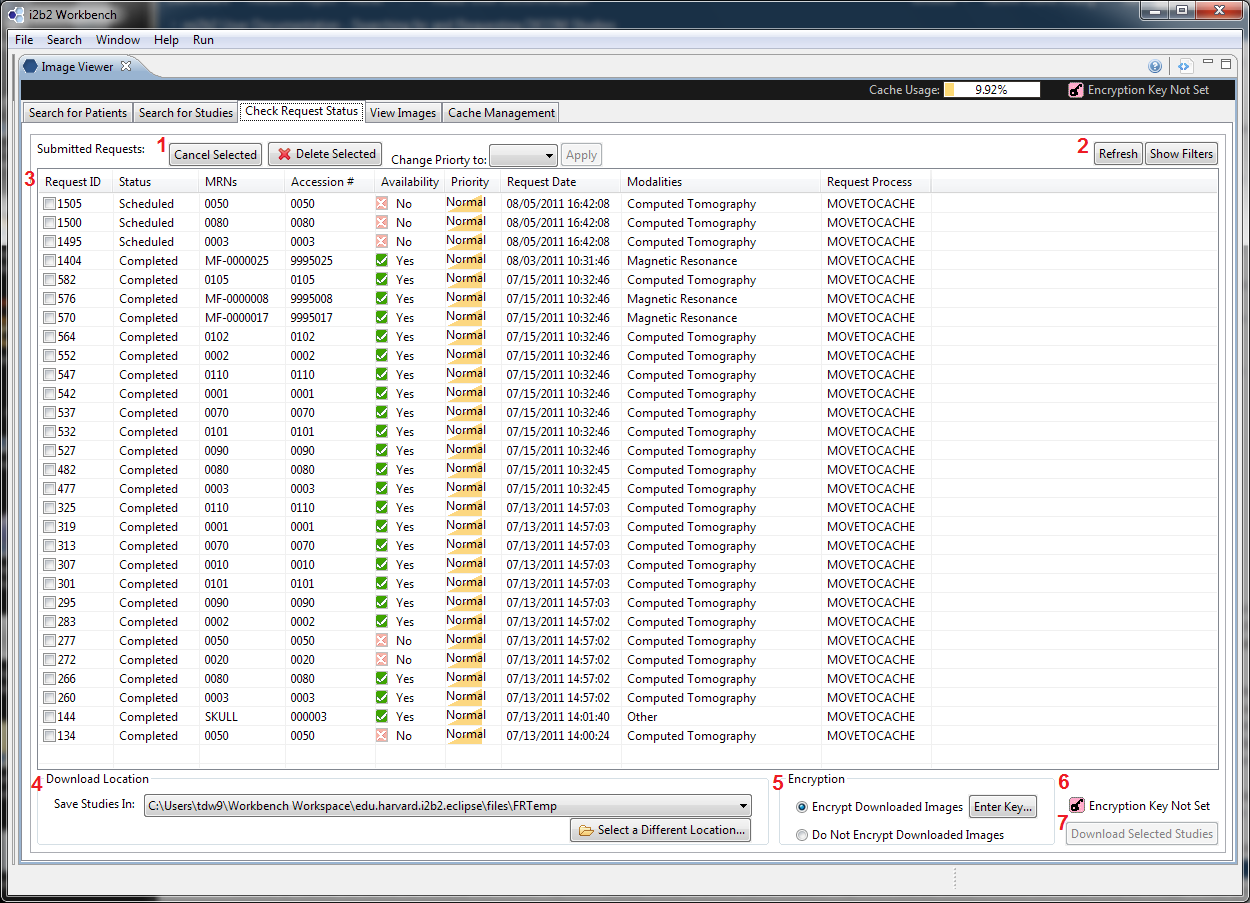
Users are transitioned to Tab 3 after selecting "Request Selected Studies" from Tab 2 or by clicking on the tab directly. This tab allows users to view the progress of all submitted requests. Since this tab does not periodically check with the mi2b2 server for the latest statuses, users are encourage to visit this tab often or click on the "Refresh" button to get the most recent statuses.
UI Layout
...
| Column |
|---|
...
Below is a screenshot of the mi2b2 client's Tab 3. The table shows all requests that have been submitted to the mi2b2 server and shows their statuses. Users can see what requests have been fulfilled and ready for download, and which ones are still being processed.
...
Each request has a status (column 2). A request's status typically transitions from Scheduled to In Process to "Completed". When an error occurs, the status will be Error. Sometimes not all images in a study are retrievable from the PACS. When this occurs, the status is Incomplete (incomplete retrieval). Finally, after a request is canceled, the status is Canceled.
Users can cancel any ongoing request (Scheduled or In Process). Users can delete requests of any status.
When a request is Scheduled, users can adjust the priority (column 6) of ongoing requests. mi2b2 server will fulfill requests with higher priority first, and lower priority last. However, this priority has no effect on
...
PACS availability
...
, nor how soon
...
PACS can deliver the studies to the mi2b2 server.
Finally, availability (column 5) shows if the study associated with a request is available for download. That is, the request has completed, and the study is already in the mi2b2 server cache.
UI Layout
| Section | ||||||
|---|---|---|---|---|---|---|
|