Page History
Design
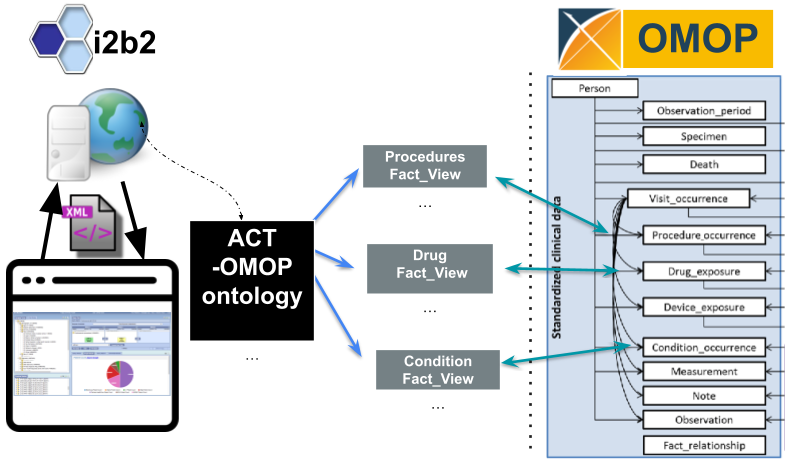
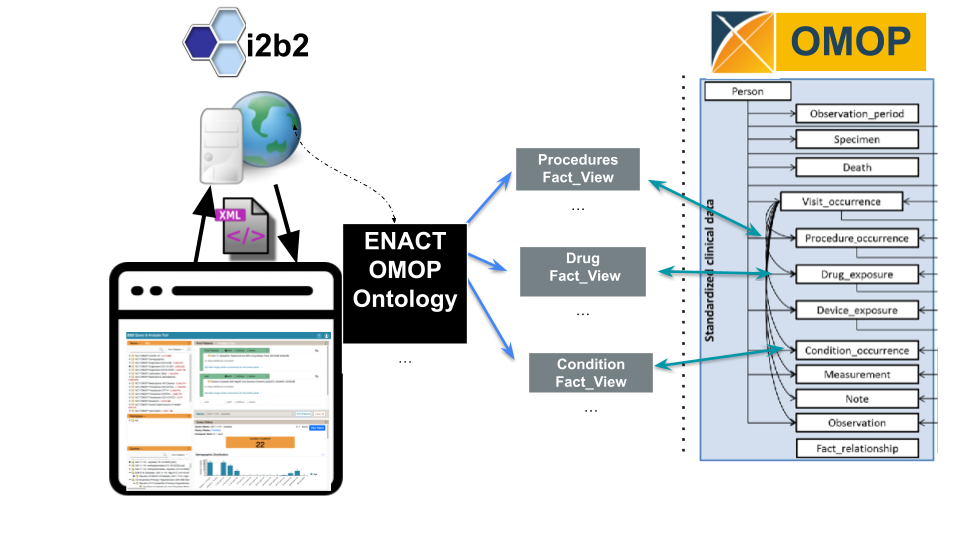
Utilizing i2b2's reusable application programming interface (API), the OMOP data model is now supported. The ENACT-OMOP ontology queries OMOP table views that correspond to the OMOP table structure. The i2b2 query tool tables and ENACT-OMOP ontology are installed in a he OMOP data and the i2b2 application layer are loaded. With the ontology, it becomes possible to query OMOP tables using the i2b2 interface. The design document can be found here.
Step 1: Acquire downloads
First, download the necessary components onto a computer that can connect to your target database and from which you can run SQL queries.
- Download i2b2.
- Download and extract the newinstall zip package from "Download Binary Distribution" in the top section of https://www.i2b2.org/software
- Determine if you need to install any additional required packages, such as Java JDK or Ant: Chapter 2. Requirements
- If running less than i2b2 1.8, separately download the latest data package from GitHub https://github.com/i2b2/i2b2-data to get the ACT-OMOP ontologies.
- OMOP 5.4 DDL SQL Scripts: https://github.com/OHDSI/CommonDataModel/tree/main/inst/ddl/5.4
- Either clone the repository or download the ETL scripts for your database platform.
Step 2: Create core tables and Views (OMOP, i2b2, and ACT-OMOP specific):
- OMOP: If you will be creating a new OMOP database for this installation, then:
- Run the OMOP 5.4 DDL SQL Scripts you downloaded in the last step, using a SQL client.
- It is recommended to run the DDL, indices, and primary key scripts, but NOT the constraints scripts. This can cause problems during ETL.
- Run the OMOP 5.4 DDL SQL Scripts you downloaded in the last step, using a SQL client.
- If you have not installed i2b2 previously (i.e. you are not setting this up as an i2b2 Project in a larger installation):
- Make sure i2b2 is configured for multiple fact tables by changing the appropriate entry in the database.
- i2b2: You will be installing i2b2 as explained in the installation guide. Follow the chapters in the installation guide, but see the notes in the next bullet on Chapter 3.
- Chapter 3. Data Installation requires special handling. All the steps in the installation guide should be followed except for the following changes in the CRC and Metadata sections::
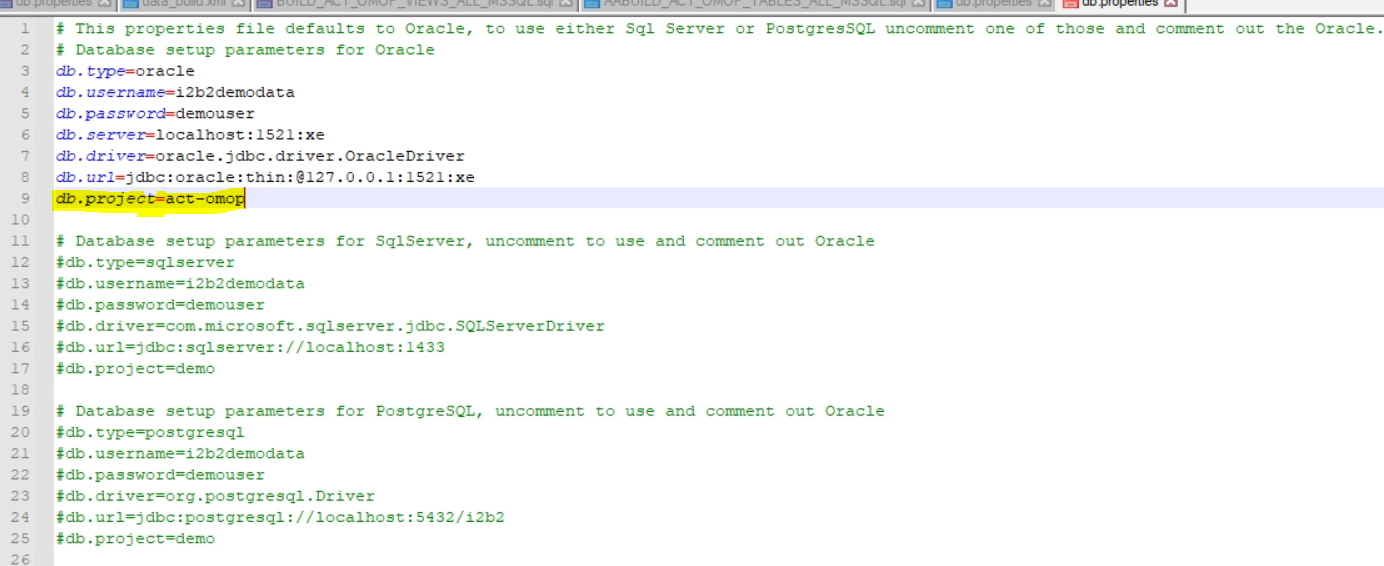
- You need to select the act-omop project for Metadata and CRC. Specifically, in 3.4.2 Set Database Properties (CRC) and 3.7.2 Set Database Properties (Metadata), edit the CRC db properties file to set db.project parameter to act-omop.
- Instead of CRC install step 3.4.
- 4, drop the patient_dimension and visit_dimension tables from the database. For convenient reference, the correct steps 3.4.3-3.4.5 are summarized here:
ant -f data_build.xml create_crcdata_tables_release_1-7
FROM THE DATABASE: DROP PATIENT_DIMENSION; DROP VISIT_DIMENSION;
ant -f data_build.xml create_procedures_release_1-7
ant -f data_build.xml db_demodata_load_data
The final ant script will create act-omop Views, which point to the OMOP tables, and loads the concept_dimension table with act-omop concepts data. The first two steps create the standard CRC tables and procedures.
- 4, drop the patient_dimension and visit_dimension tables from the database. For convenient reference, the correct steps 3.4.3-3.4.5 are summarized here:
| Info |
|---|
Be sure to drop/rename PATIENT_DIMENSION and VISIT_DIMENSION tables before you run the db_demodata_load_data ant target. |
Step 3: ACT-OMOP v4 ontology data load process
In 3.7.
4, only load the regular data, not the identified data. Run the ant command:
ant -f data_build.xml db_metadata_load_data
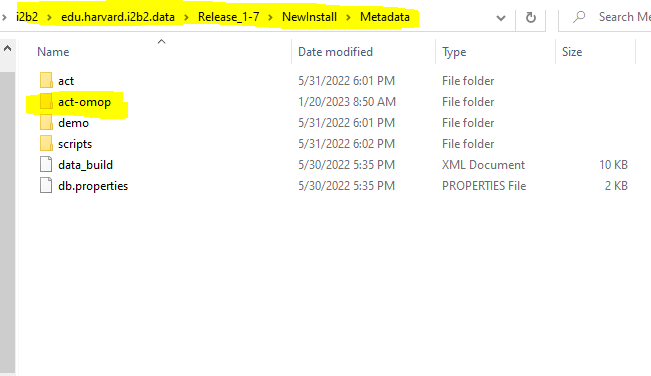
- This will execute the SQL scripts from the edu.harvard.i2b2.data\Release_1-7\NewInstall\Metadata\act-omop\scripts\<db type> folder and:
- Creates ACT-OMOP v4.1 Ontology metadata tables with indexes.
- Loads the act-omop metadata
- This will execute the SQL scripts from the edu.harvard.i2b2.data\Release_1-7\NewInstall\Metadata\act-omop\scripts\<db type> folder and:
- Make sure i2b2 is configured for multiple fact tables by changing the appropriate entry in the database.
| Info |
|---|
Be sure to drop/rename PATIENT_DIMENSION and VISIT_DIMENSION tables before you run the db_demodata_load_data ant target. |
| Info |
|---|
The Lab metadata tables should have data in the C_METADATAXML column in order for the lab values to be queriable from UI If the C_METADATAXML is missing from the source ontology Lab metadata file, you can load the values from the standard i2b2-ACT Lab metadata table. |
| Info |
|---|
The CPT4 ontology table is not included with i2b2 due to AMA restrictions on redistribution of CPT code information. Contact the ACT team to get a copy if your institution is an AMA member. |
Step 4: Create Project
Finally set up an i2b2 OMOP project pointing to the i2b2-OMOP database that you just configured.
6.6.0. [DRAFT] Guide to creating a new project with the admin tool.
Verify the Ontology is displayed and queriable from the webclient
Notes
Both the ACT-OMOP Ontology tables, views and data is available under edu.harvard.i2b2.data\Release_1-7\NewInstall\Metadata\act-omop folder.
The scripts are in this folder:
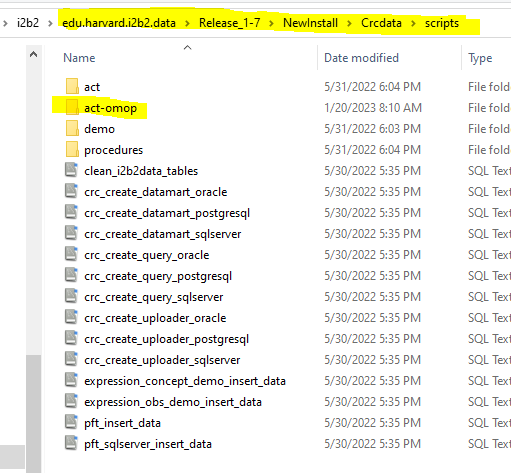
These are the ACT-OMOP ontology tables.
ACT_ICD10CM_DX_V4_OMOP ACT_ICD10PCS_PX_V4_OMOP ACT_ICD9CM_DX_V4_OMOP ACT_ICD9CM_PX_V4_OMOP ACT_CPT4_PX_V4_OMOP ACT_HCPCS_PX_V4_OMOP ACT_MED_ALPHA_V4_OMOP ACT_MED_VA_V4_OMOP ACT_MED_VA_V4_OMOP ACT_LOINC_LAB_PROV_V4_OMOP ACT_SDOH_V4_OMOP ACT_VITAL_SIGNS_V4_OMOP ACT_VISIT_DETAILS_V4_OMOP ACT_COVID_V4_OMOP ACT_DEM_V4_OMOP ACT_ICD10_ICD9_DX_V4_OMOP |
These are the ACT-OMOP views:
CONDITION_VIEW; DRUG_VIEW; MEASUREMENT_VIEW; OBSERVATION_VIEW; PROCEDURE_VIEW; COVID_LAB_VIEW; ALL_SOURCE_CONCEPTS; PATIENT_DIMENSION; VISIT_DIMENSION; DEVICE_VIEW; |
- ETL OMOP data
- This is a site-specific process, but OHDSI's WhiteRabbit tool can help: https://github.com/OHDSI/WhiteRabbit